Tutorials
Learn multi-device recording on macOS.
eREC's tutorials show you HowTo to set up devices, record sessions, and manage takes with ease on your Mac.
Setup
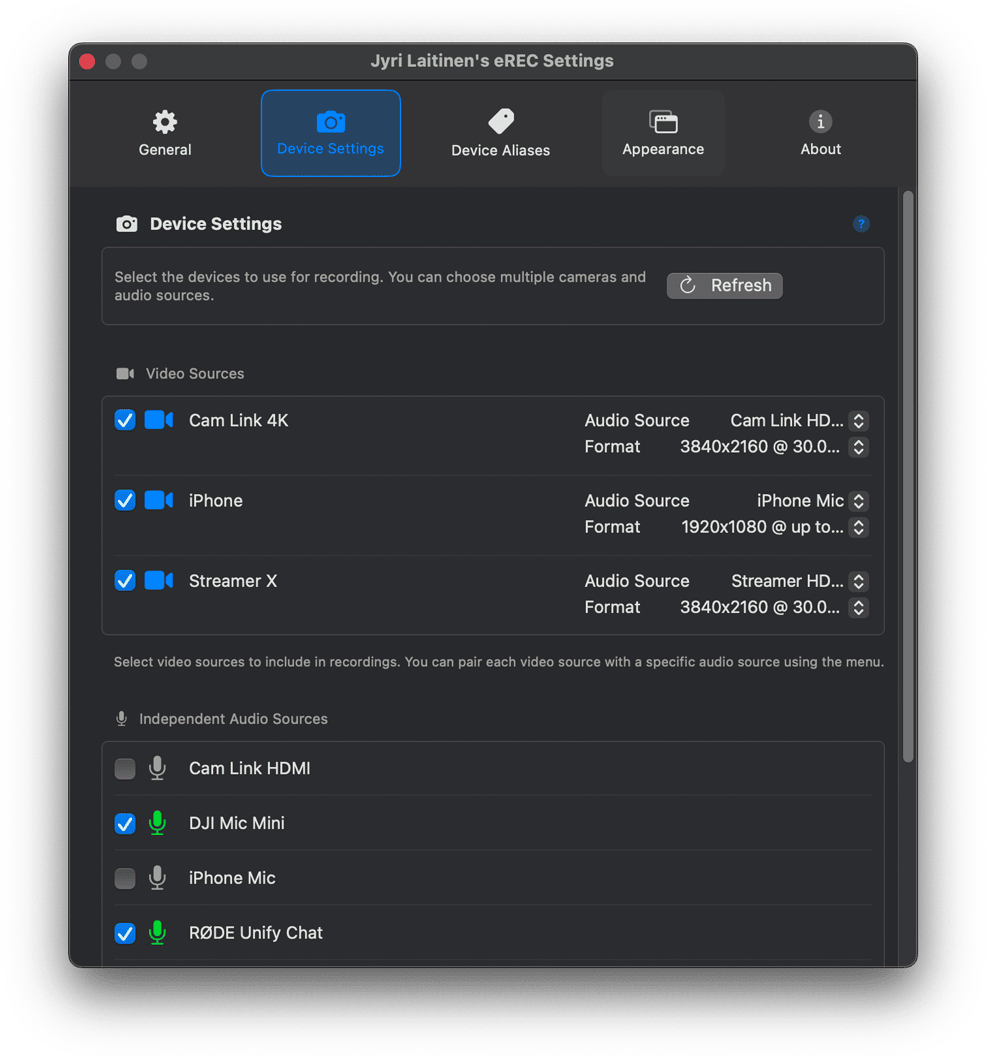
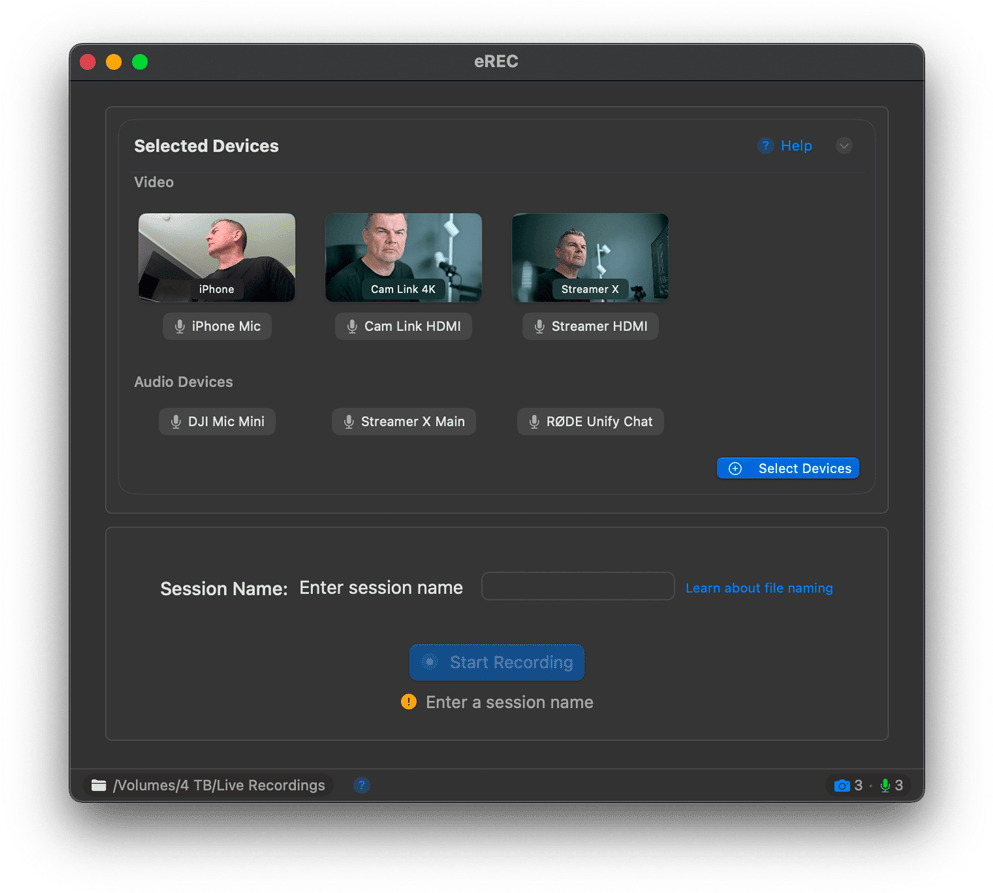
Getting Started: Permissions and Device Setup
Before recording, grant permissions and set up your devices.
- Launch eREC; macOS prompts you to allow camera and microphone access. Grant these permissions.
- If no devices are selected, click 'Add Devices' in the main window to open the Device Settings tab.
- In Device Settings, select video and audio sources. Optionally, pair audio with video devices.
- Click 'Select Devices' in the main window or status bar to revisit and adjust selections.
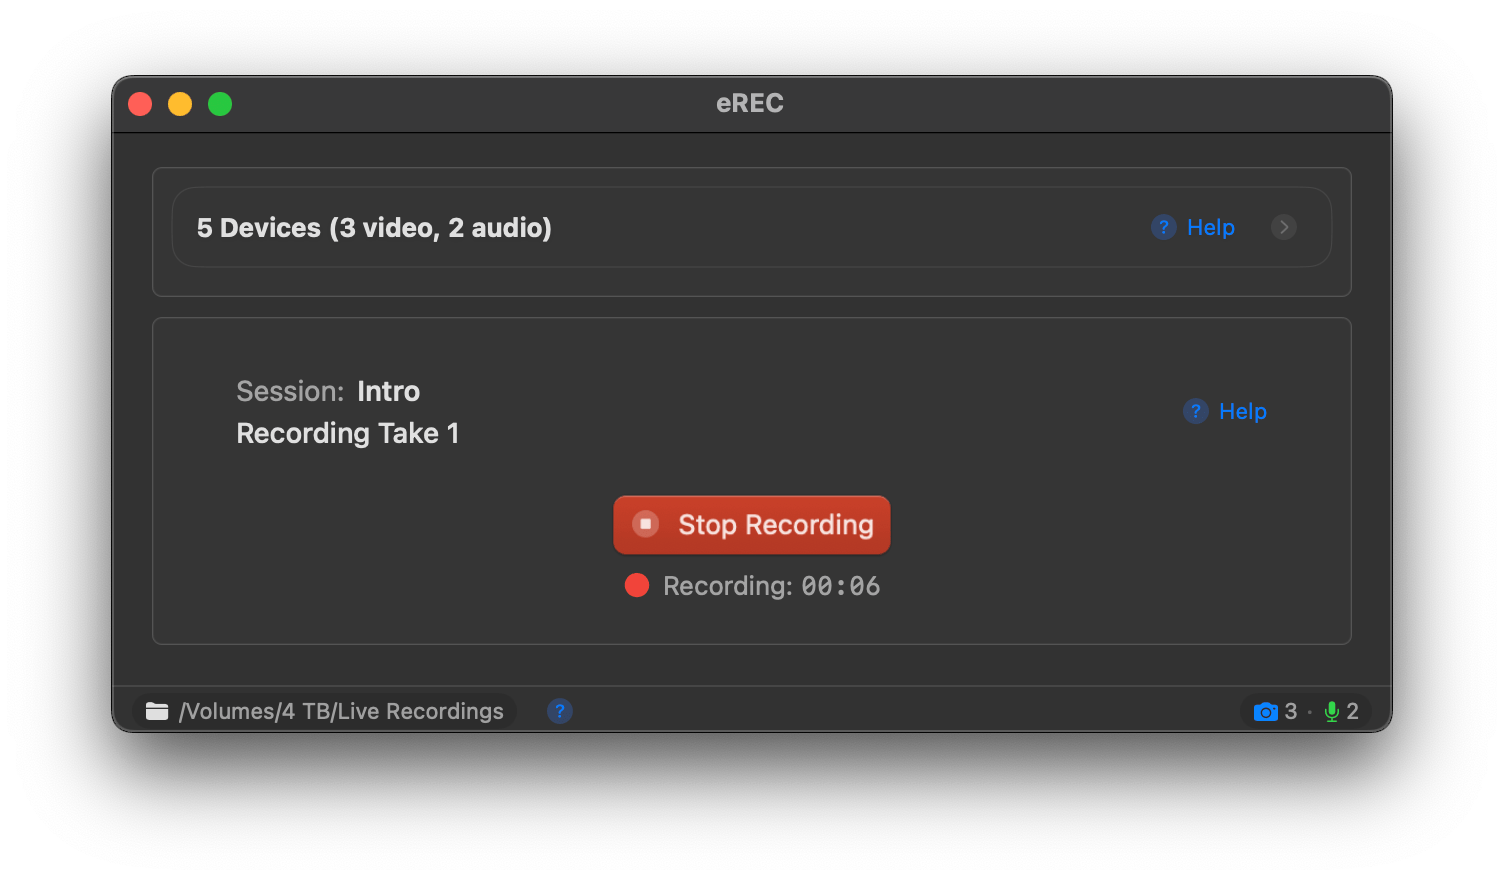
Recording: Naming Sessions and Starting Takes
Set up and start your recording sessions easily.
- Enter a session name in the main window to organize your recordings.
- Click 'Start Recording' or press Cmd+R to begin.
- The button turns red, and recording starts for all selected devices.
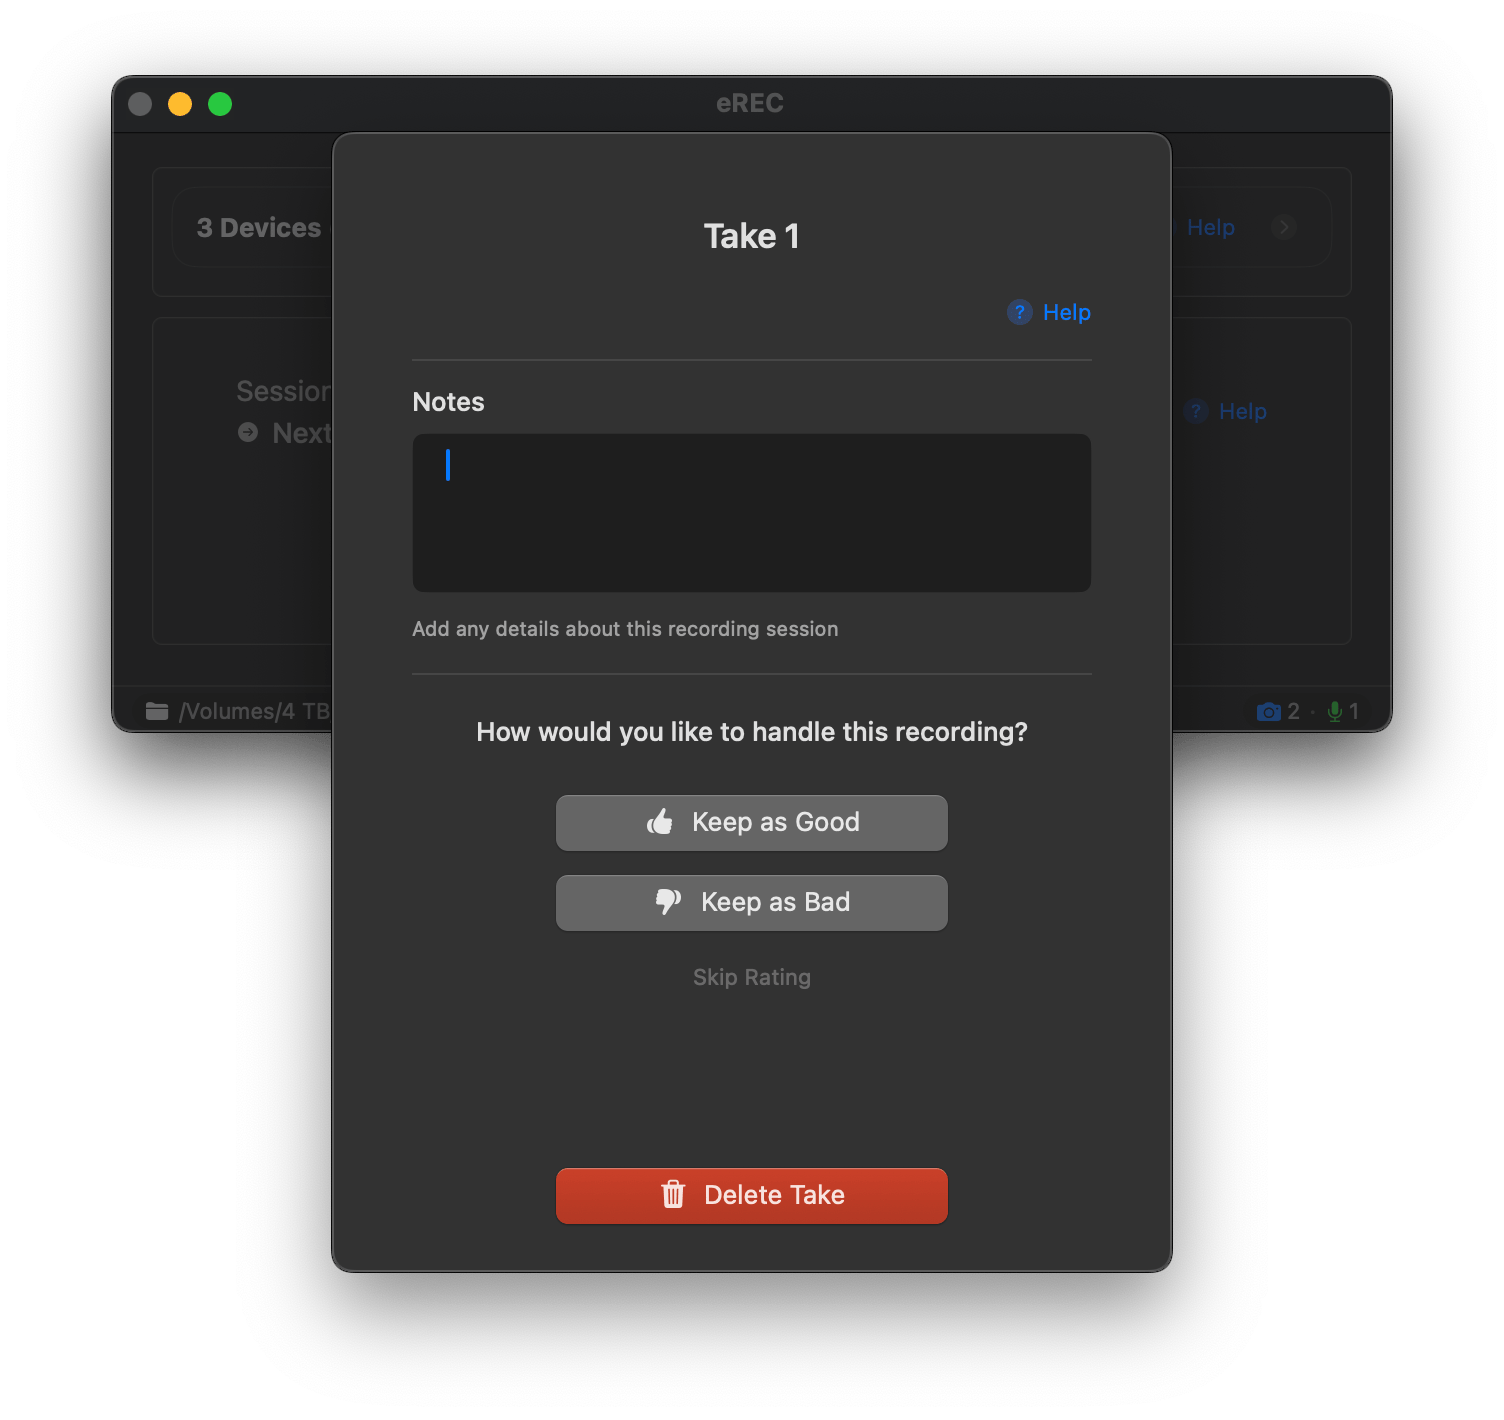
Managing Takes: Rating and Notes
Rate and manage takes after recording.
- After stopping, the Rating View appears.
- Rate the take as 'Good,' 'Bad,' 'Skip Rating,' or 'Delete.'
- Add notes, which are auto-saved.
Monitoring Your Recordings
Monitor live recordings with thumbnails and preview windows.
- View live thumbnails of video sources in the main window.
- Click a thumbnail to open a larger preview window.
- Adjust preview sizes in Settings > Appearance Settings (Small, Medium, Large, Extra Large).
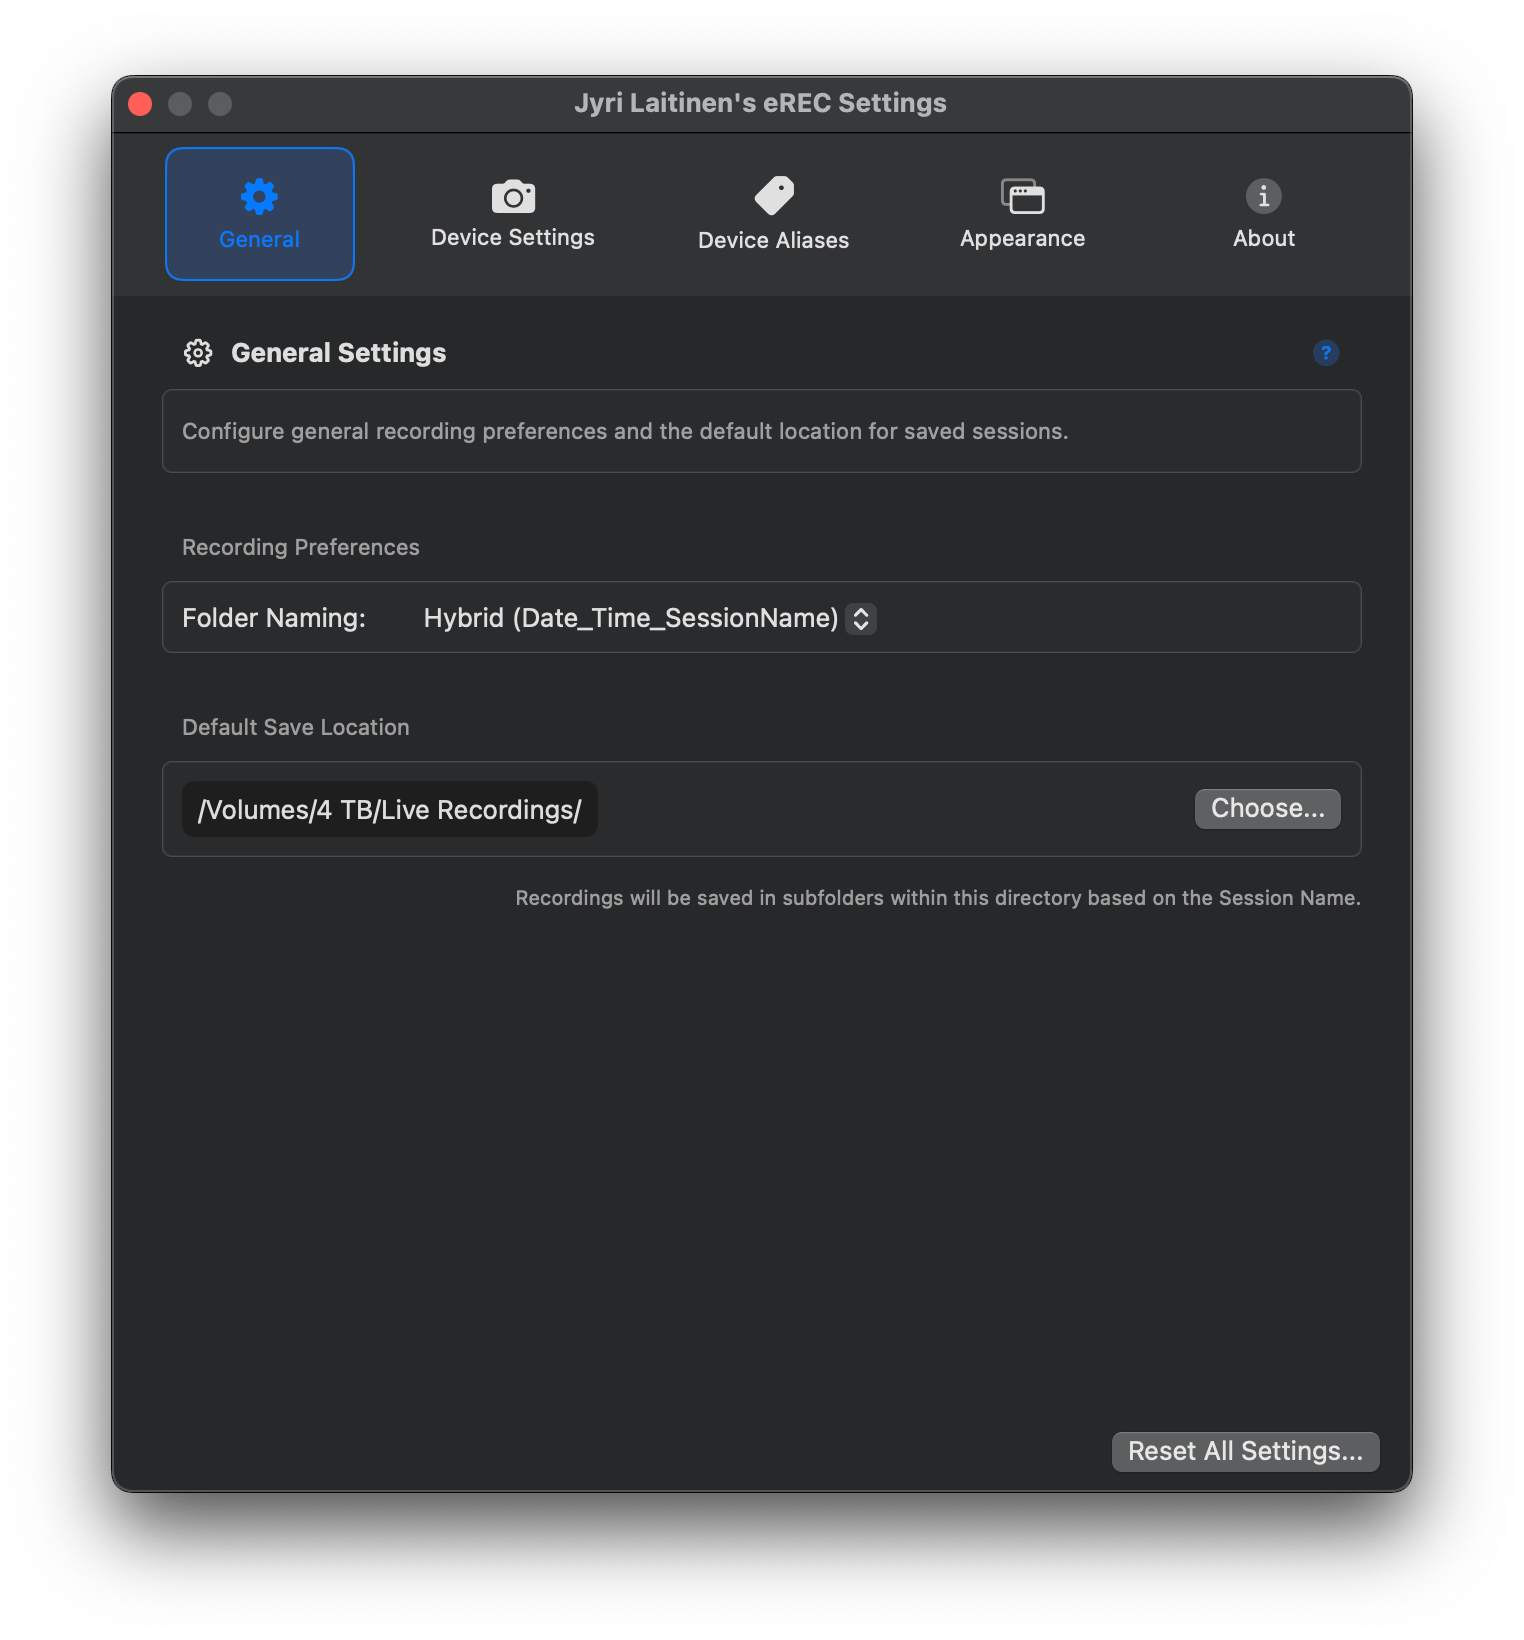
Customizing eREC Settings
Tailor eREC to your workflow with adjustable settings.
- Access Settings via Cmd+, to customize file locations and more.
- Set device aliases; these names appear throughout the app.
- Define preview window sizes and window behavior in Settings > Appearance.